

HubSpot and Drivebox Integration User Guide
Welcome to the detailed guide on how to make the most of the Nexce.io platform to seamlessly integrate Google Drive with HubSpot. If you’re looking for an effective solution to manage files and folders between these two important services, you’ve come to the right place! Nexce.io simplifies the process, allowing you to focus on what matters most: your work.
Let’s explore how to set up and use Nexce.io to optimize your workflow.
1. Prerequisites
Before you begin, ensure you have access to the following accounts:
- Nexce.io Account: For managing integrations.
- Google Drive Account: The cloud storage service for your files.
- HubSpot Account: Your CRM platform.
2. Initial Setup & Authentication
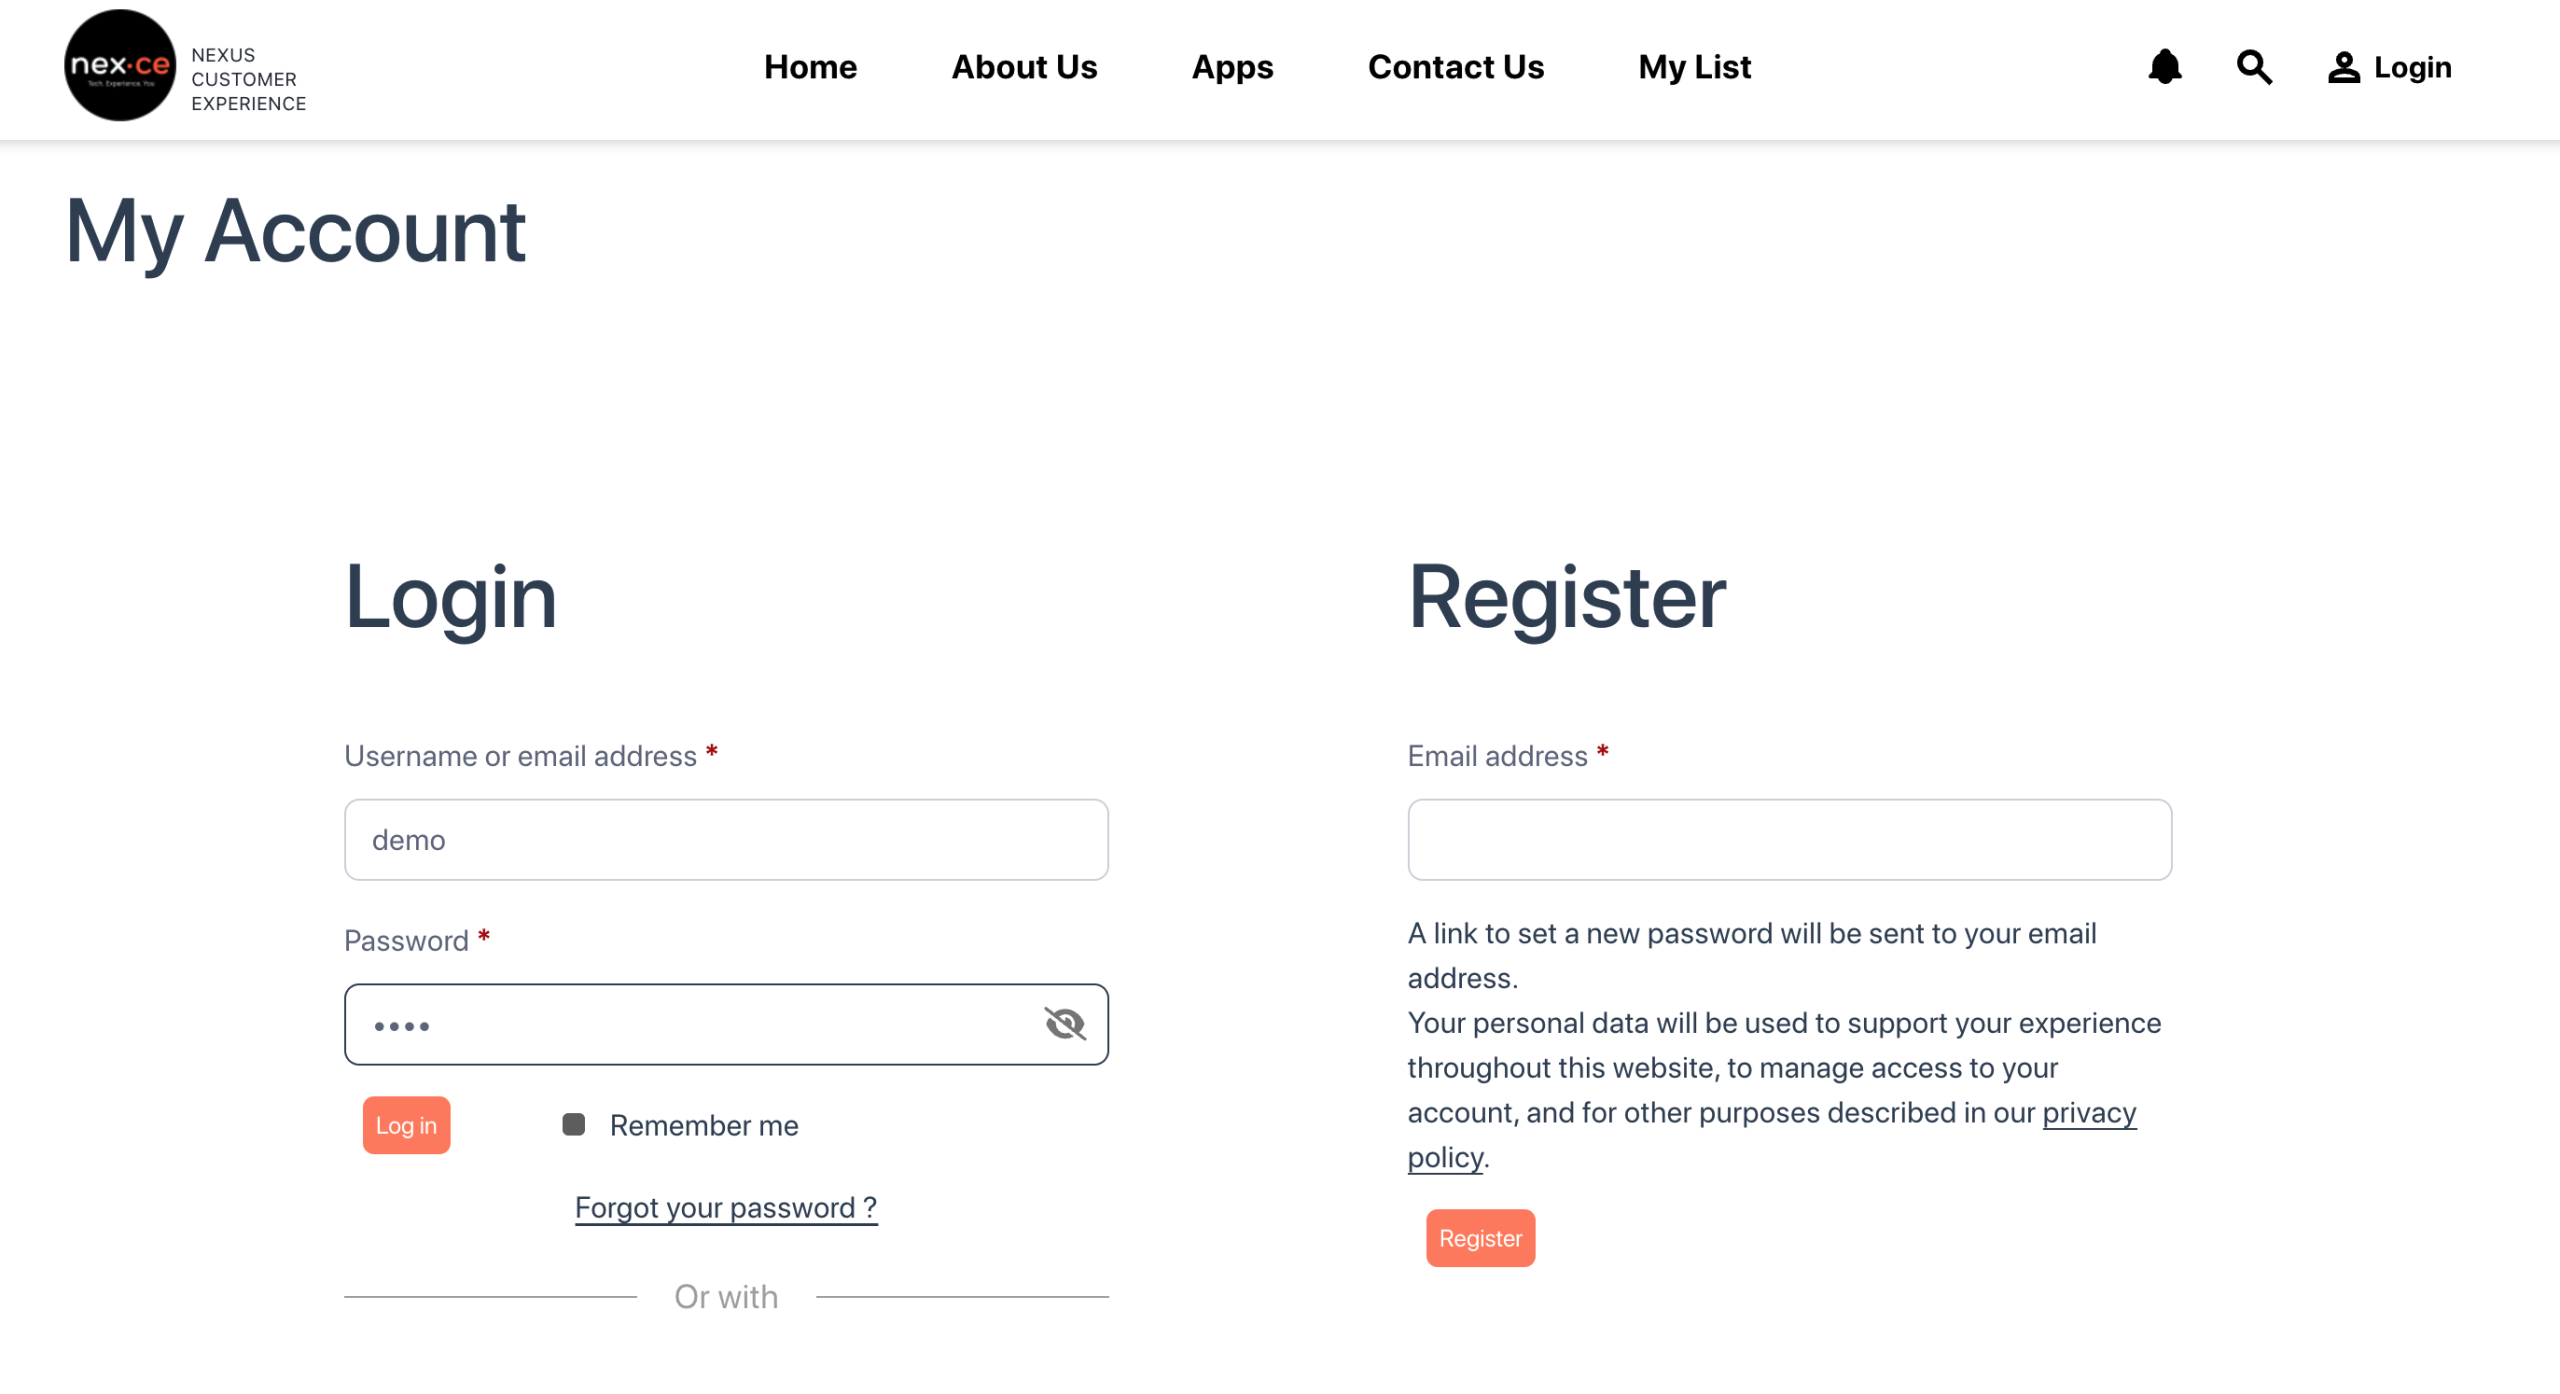
2.1. Log in to Nexce.io
- Visit the Nexce.io login page: https://nexce.io/my-account/
- Register and Login with your account
- Click the “Log In” button.
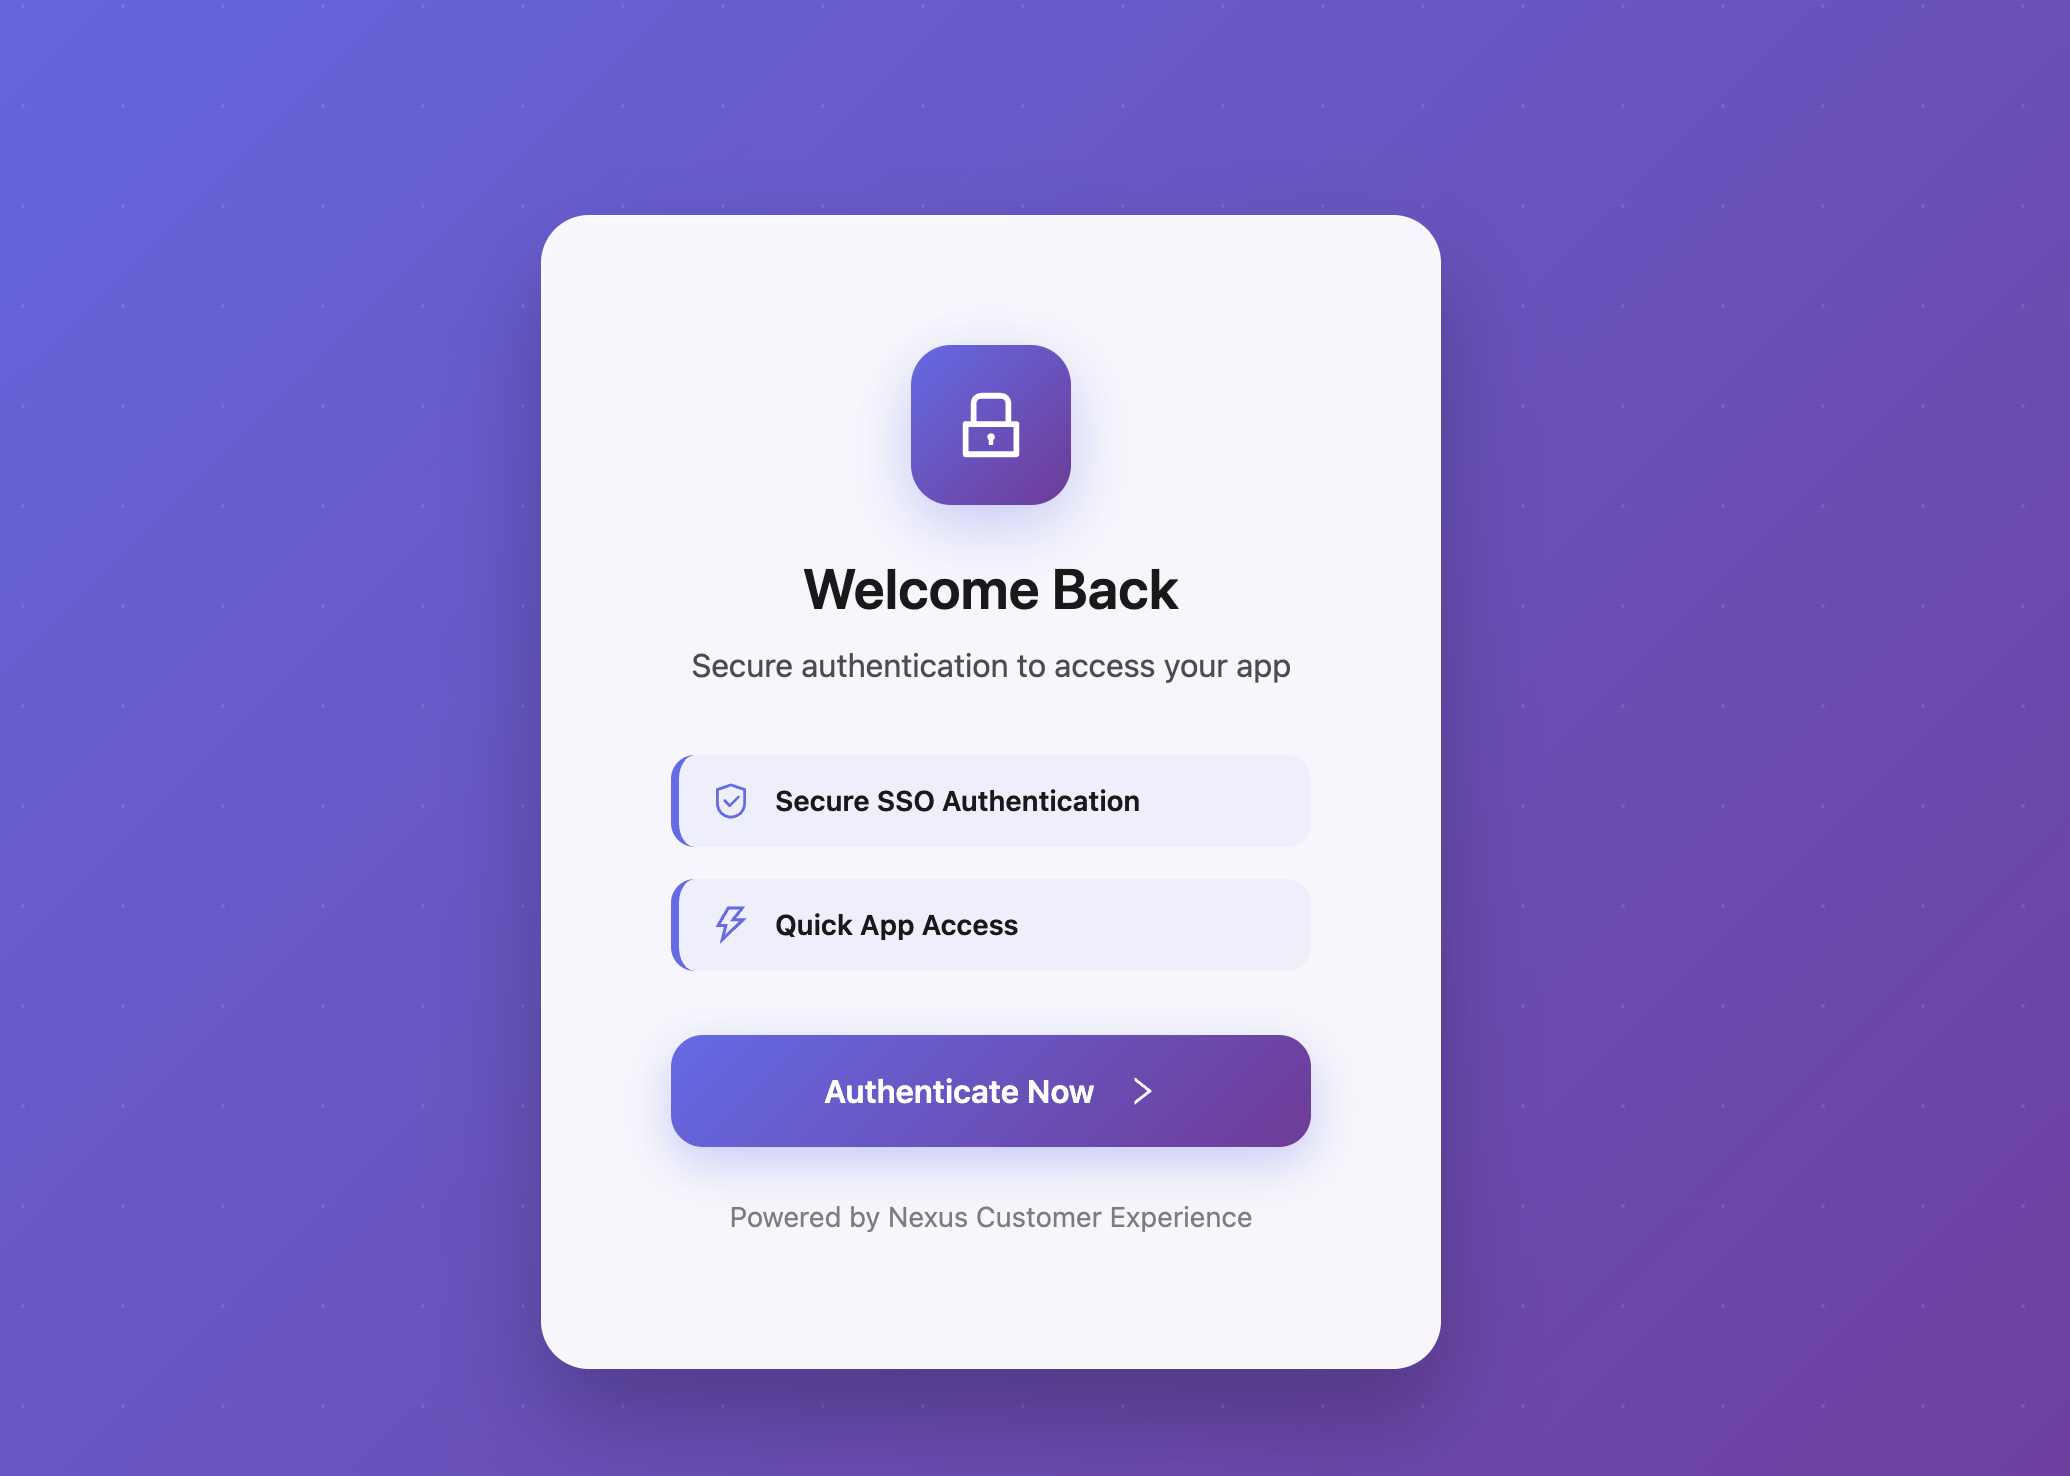
2.2. Authenticate (OAuth Flow)
This step authorizes ‘Google Drive App’ to access your Nexce.io.
- Navigate to the authentication page: https://gdrive.nexce.io/authen
- Click the “Authenticate Now” button.
- Granting the necessary permissions to Nexce.io.
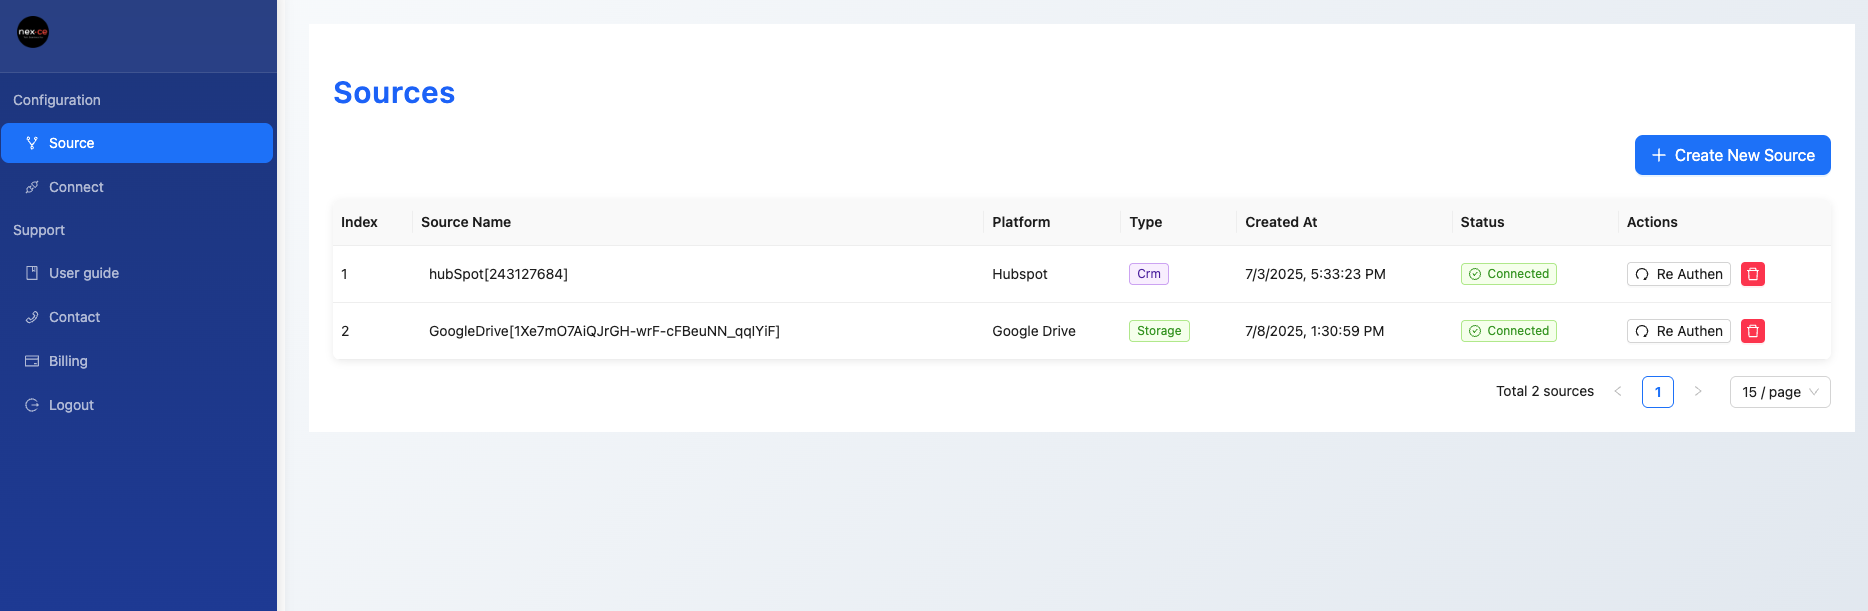
3. Configuring ‘Google Drive’ Sources
A “Source” in Nexce.io represents a connected service, in this case, your Google Drive.
3.1. Create a ‘Google Drive’ Source
- Once logged into Nexce.io, navigate to the “Source” section of the application.
- Look for an option to “Add New Source“
- Select “Google Drive” as the source type.
- Follow any additional prompts to configure and save your Google Drive source.
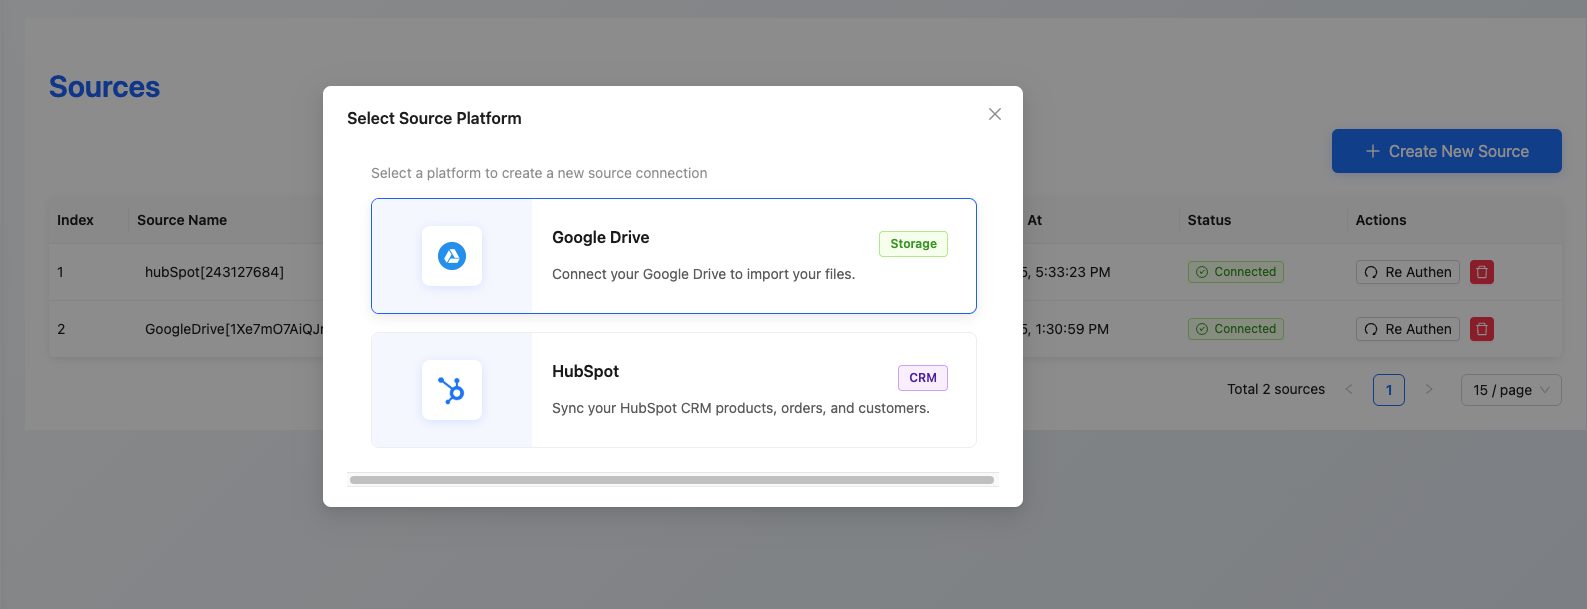
3. Configuring ‘HubSpot’ Sources
A “Source” in Nexce.io represents a connected service, in this case, your HubSpot.
3.1. Create a ‘HubSpot’ Source
- Once logged into Nexce.io, navigate to the “Source” section of the application.
- Look for an option to “Add New Source“
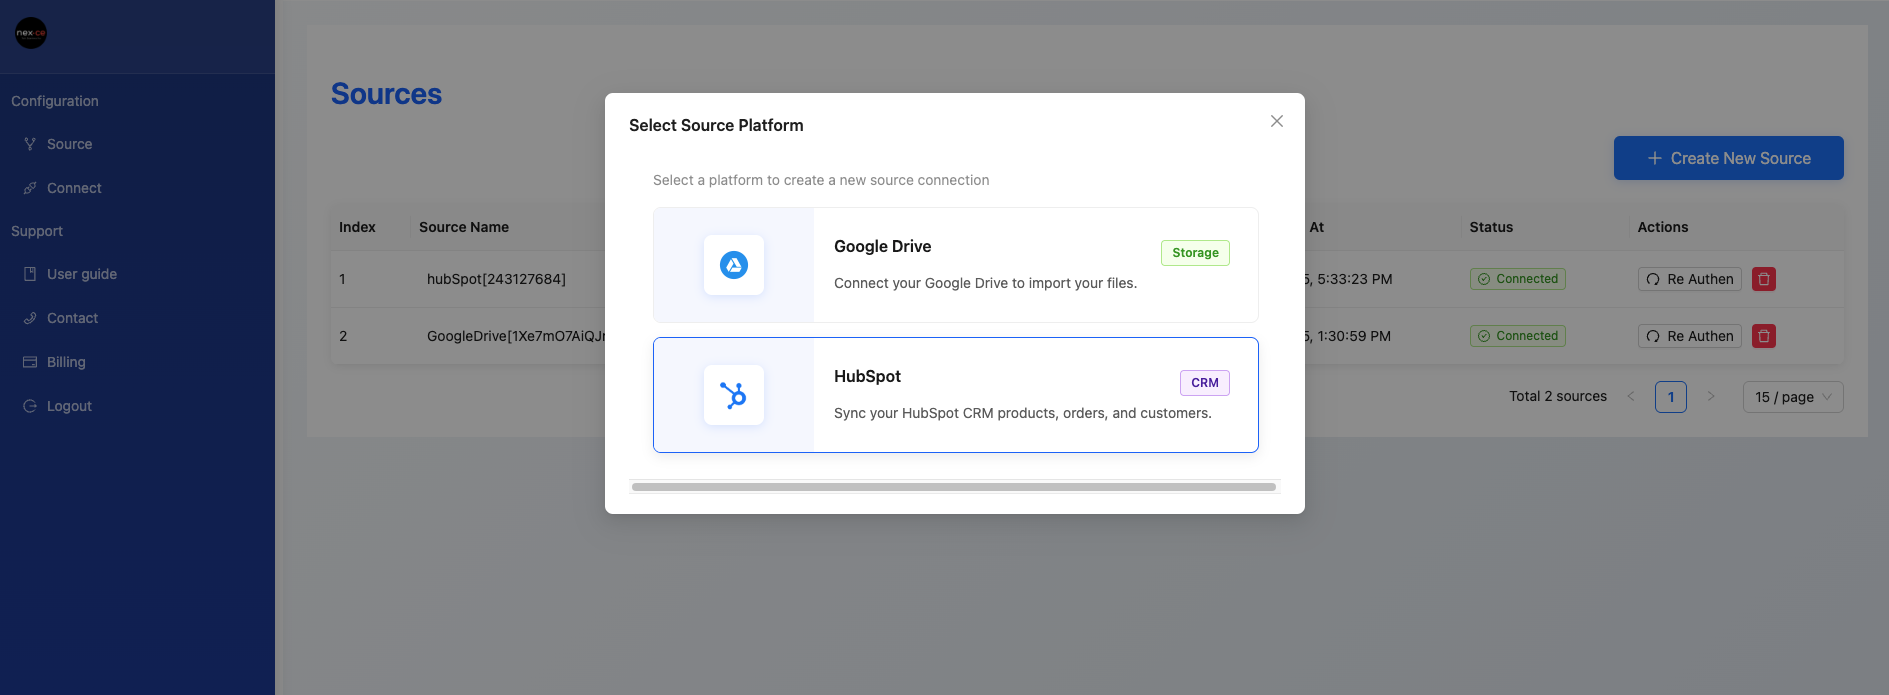
- Select “HubSpot” as the source type.
- Follow any additional prompts to configure and save your HubSpot source.
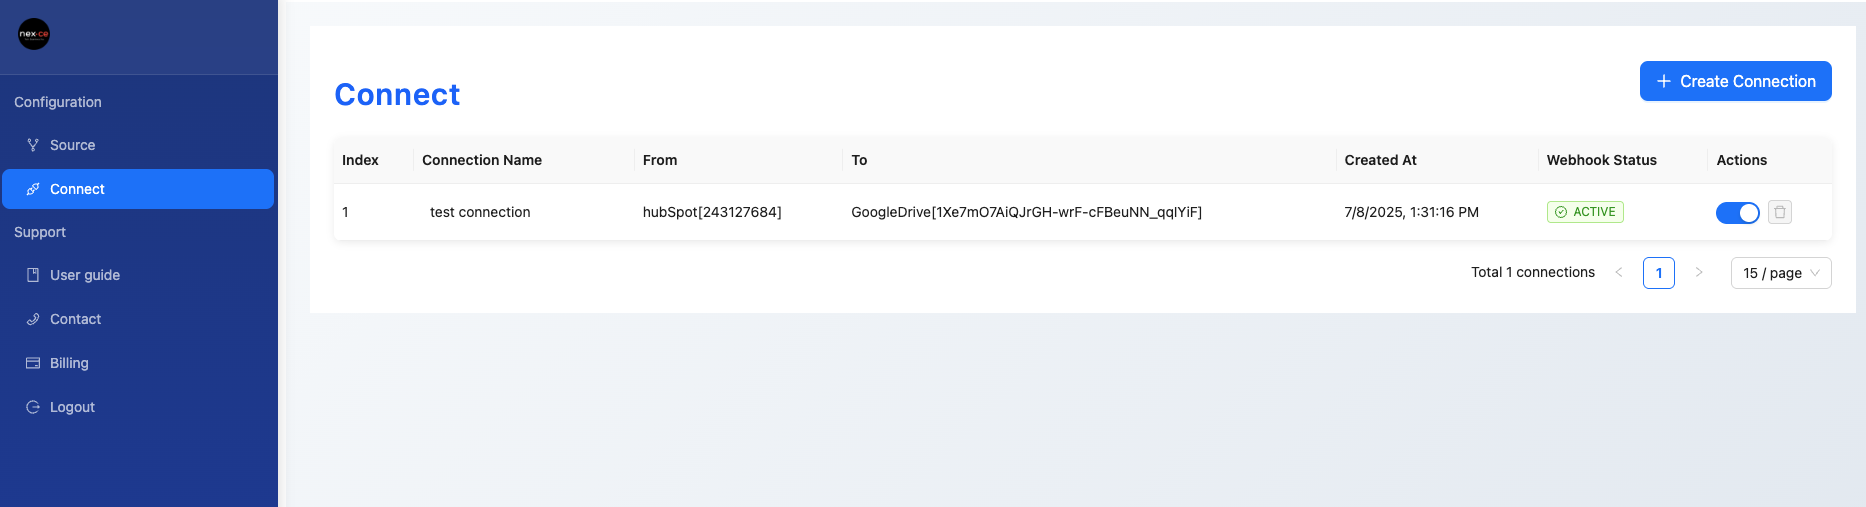
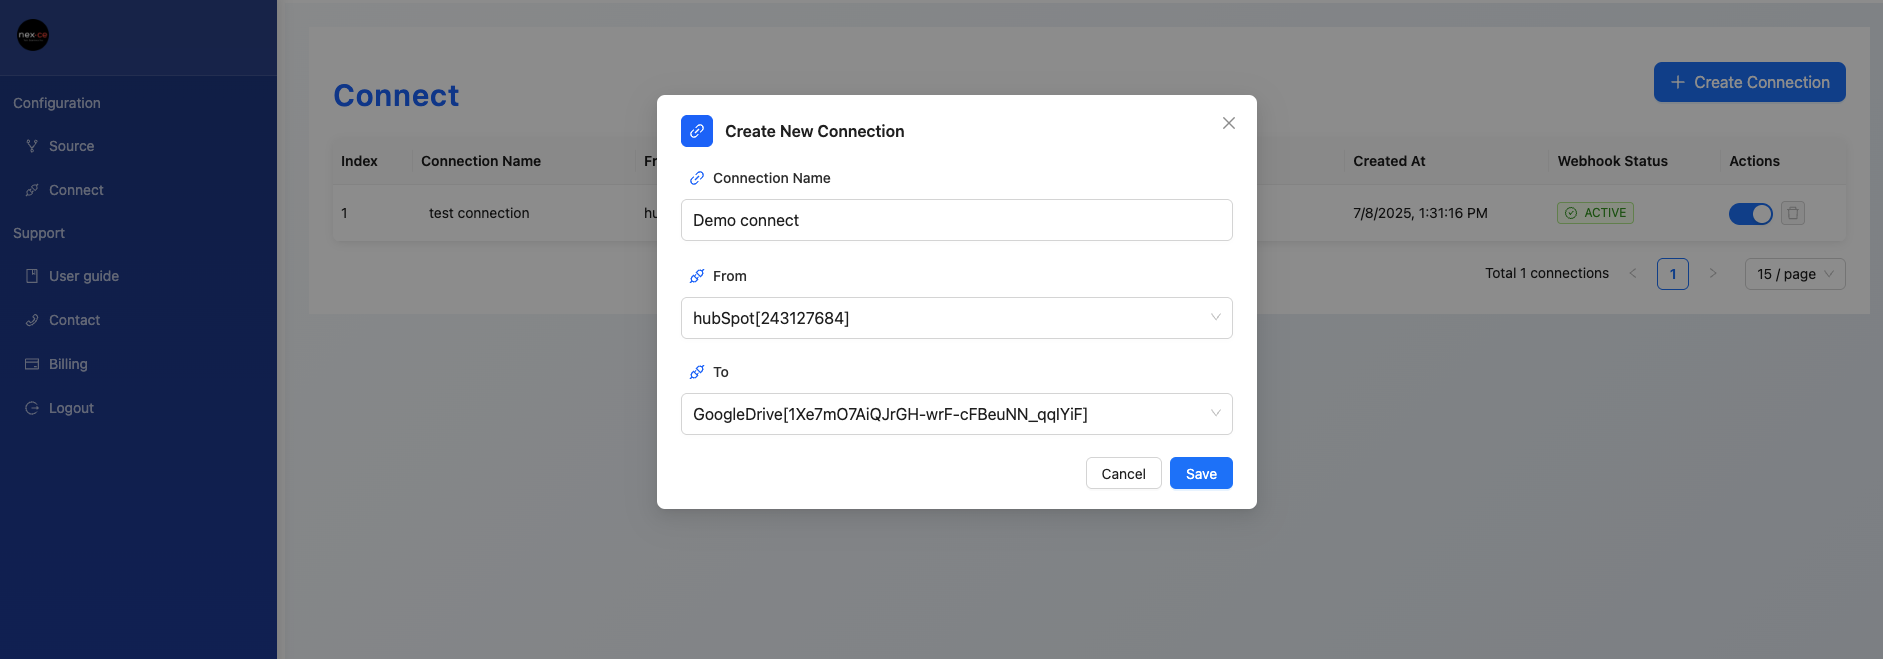
4. Creating Connections
A “Connection” links two or more sources, allowing data flow between them. Here, you’ll connect HubSpot and Google Drive.
4.1. Create a Connection between HubSpot and Google Drive
- Go to the “Connect” section within the Nexce.io application.
- Initiate the creation of a new connection.
- Select “HubSpot” as one endpoint and “Google Drive” as the other endpoint for your connection.
- Configure any specific settings for the connection, such as synchronization rules or data mapping, if presented.
- Save the connection.
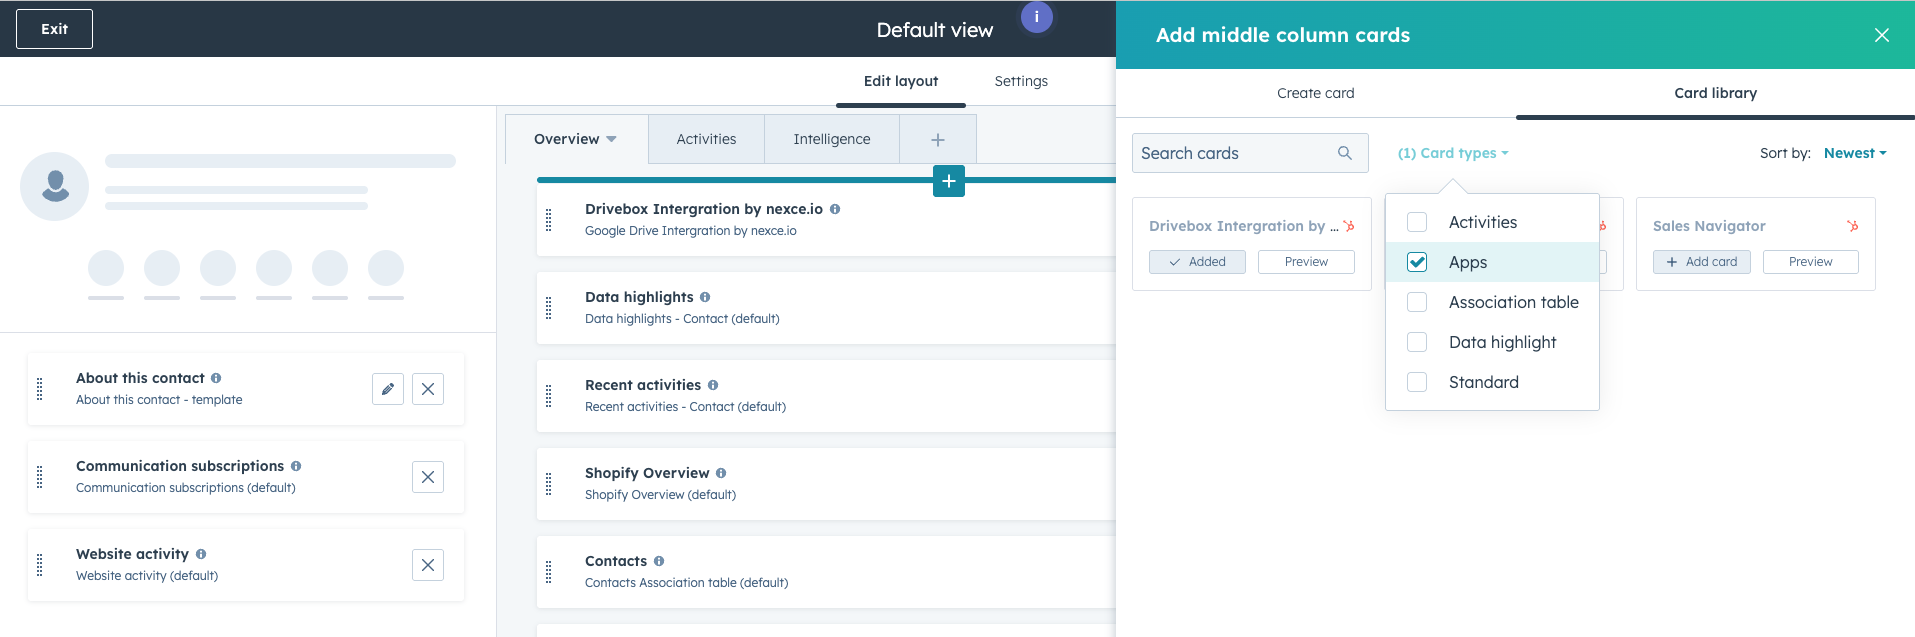
*Display ‘Drivebox Integration by nexce.io’ Card in HubSpot
After installing the Nexce.io integration, you can customize its display on the Contact detail or Deal pages in HubSpot.
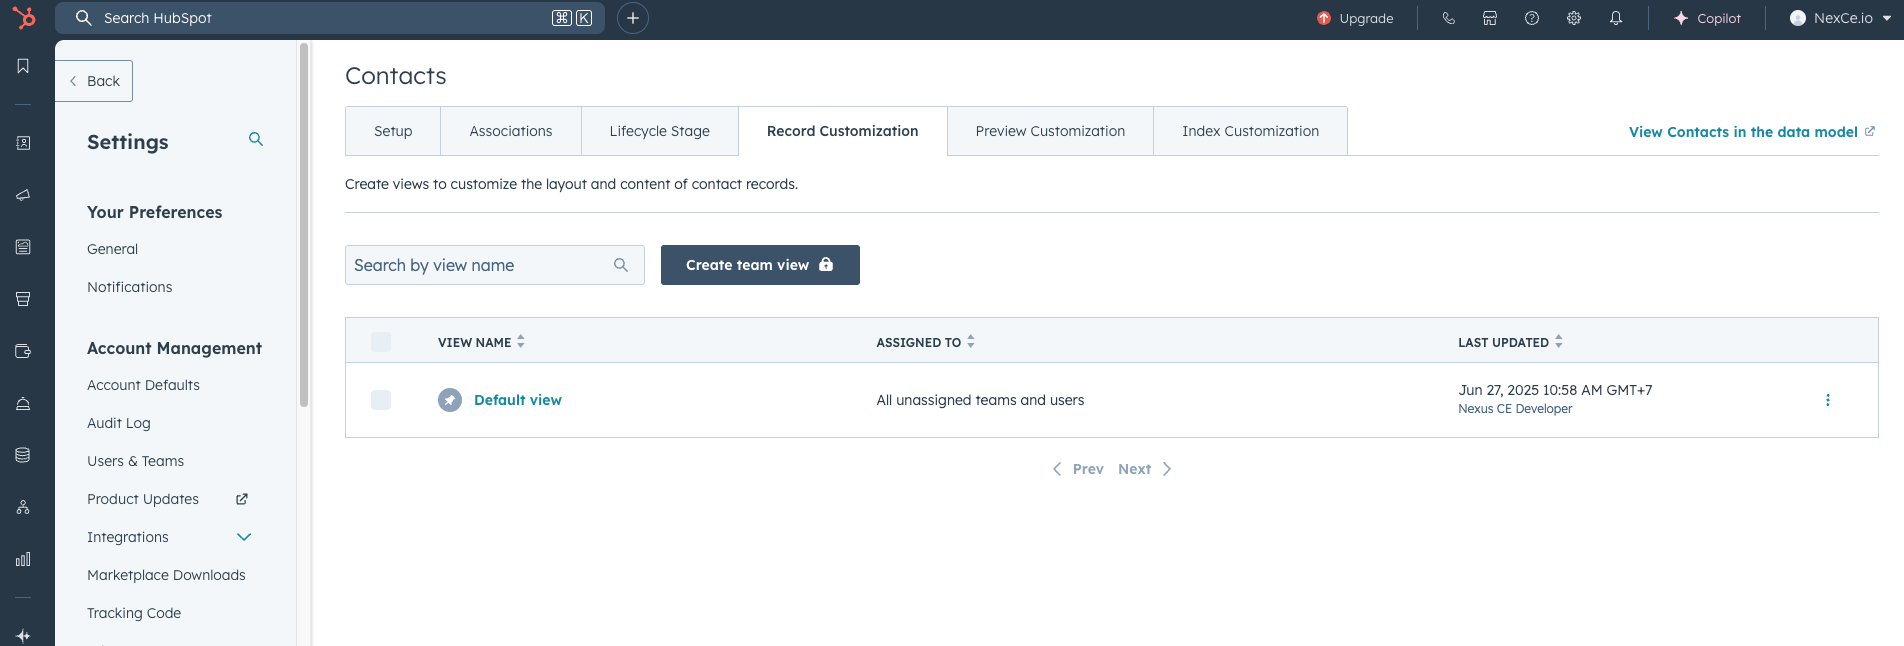
- In HubSpot, navigate to a Contact or Deal detail page.
- On the detail page, find and click the “Customize” button or settings icon to edit the layout.
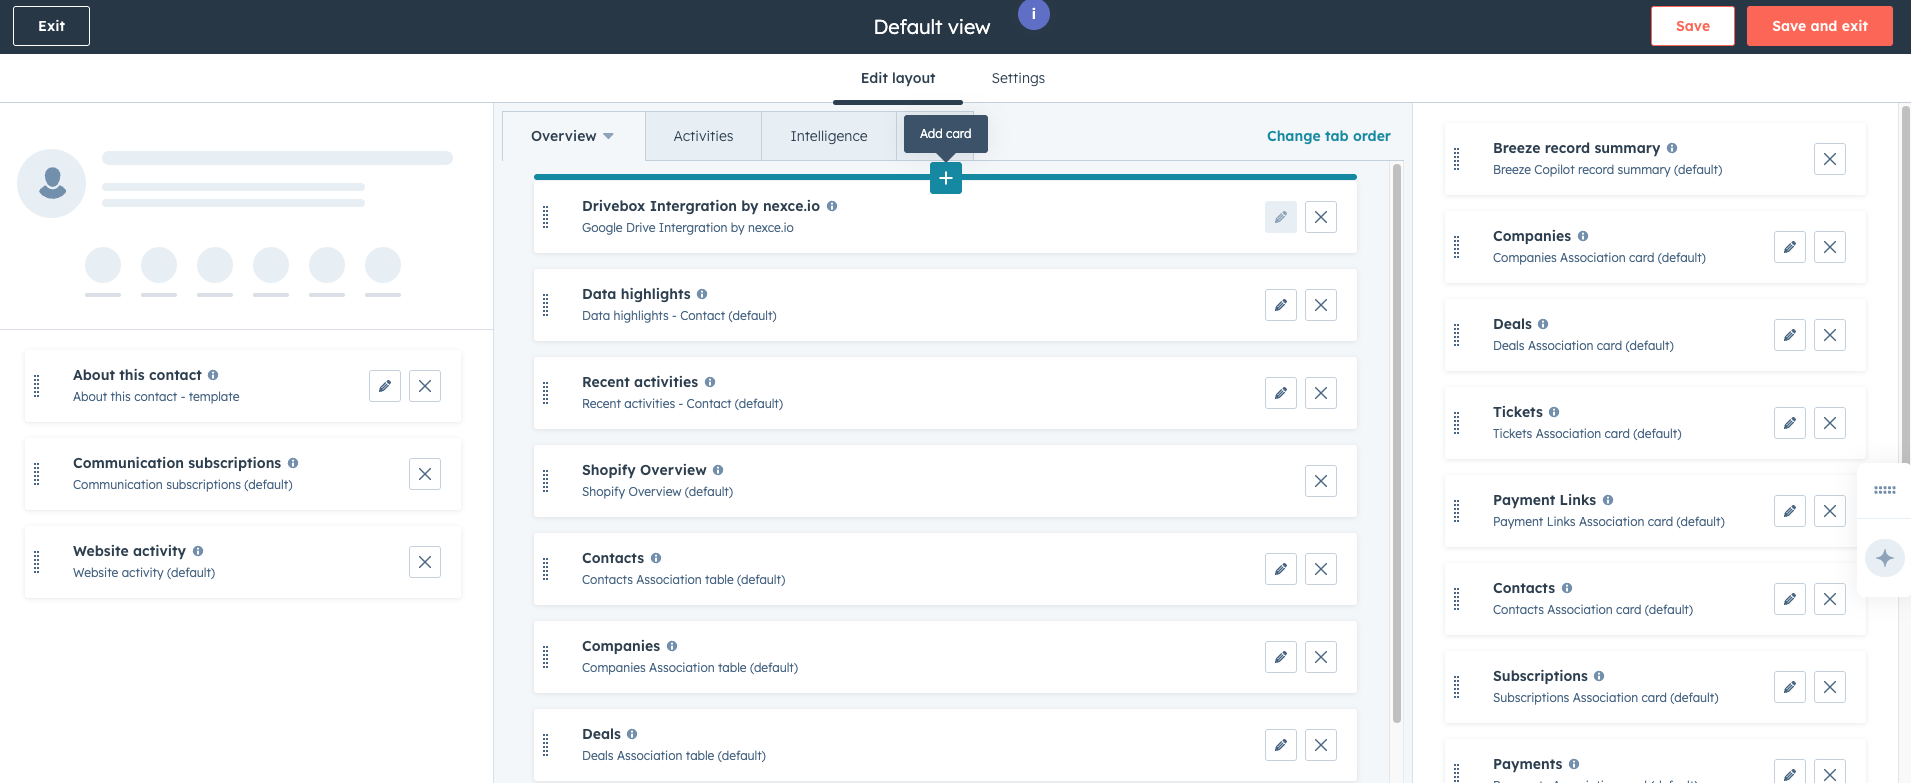
- In the customization menu, select “Edit layout” or similar.
- Find the “Card Library” or “Card types” section.
- Within this section, navigate to the “Apps” category.
- Locate and select the “Drivebox Integration by nexce.io” card.
- Drag and drop this card to your desired position in the layout (e.g., the middle column).
- Save your layout changes.
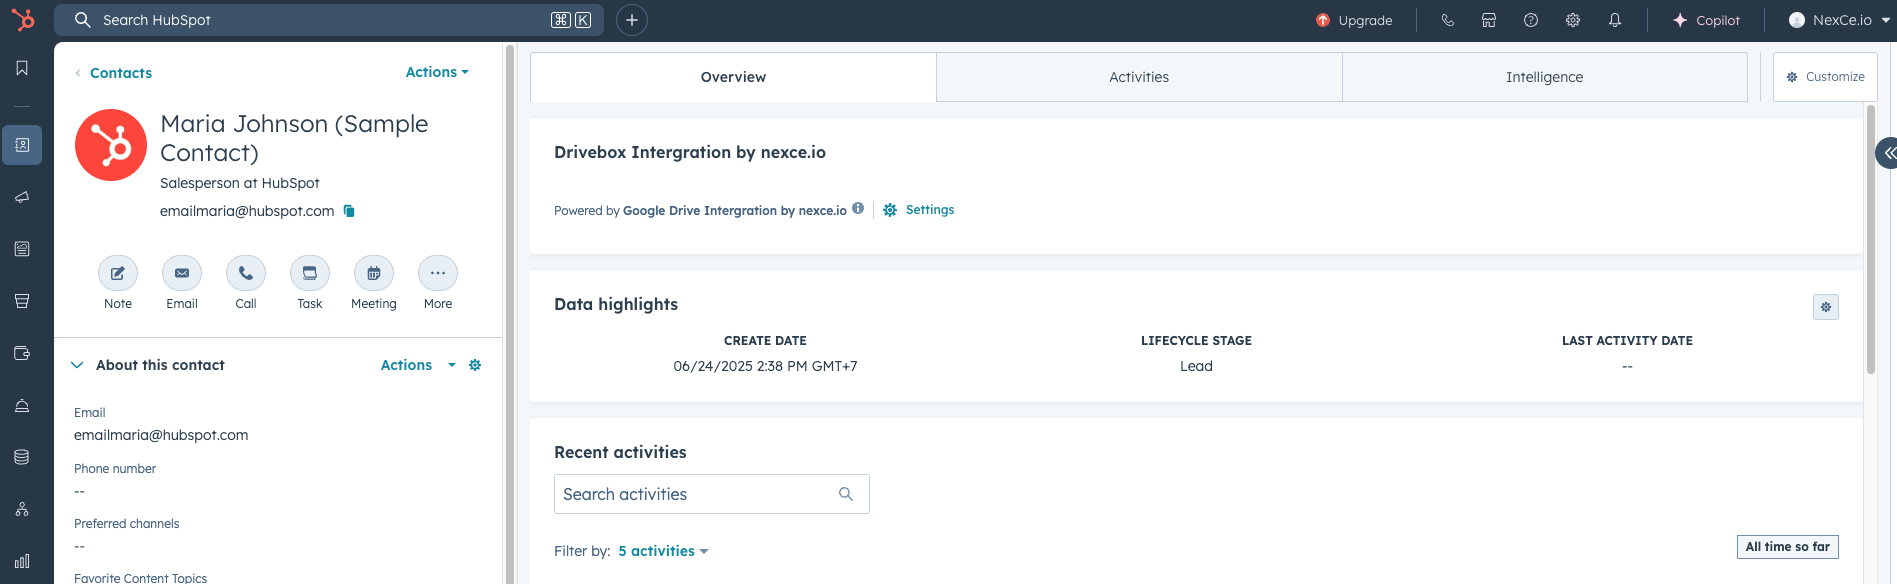
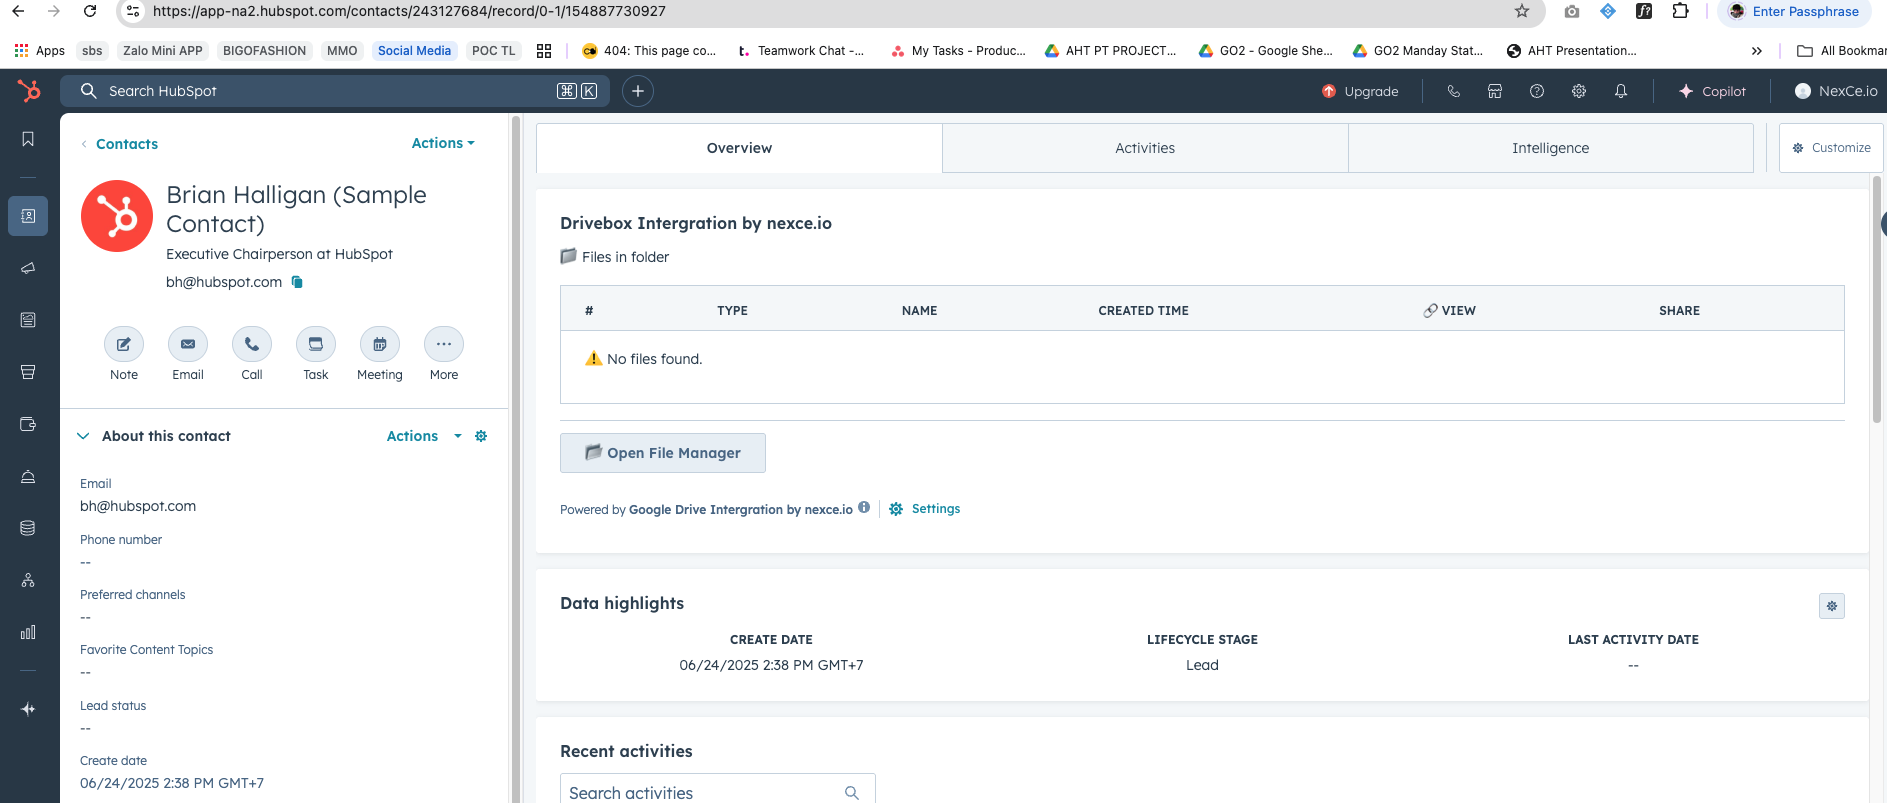
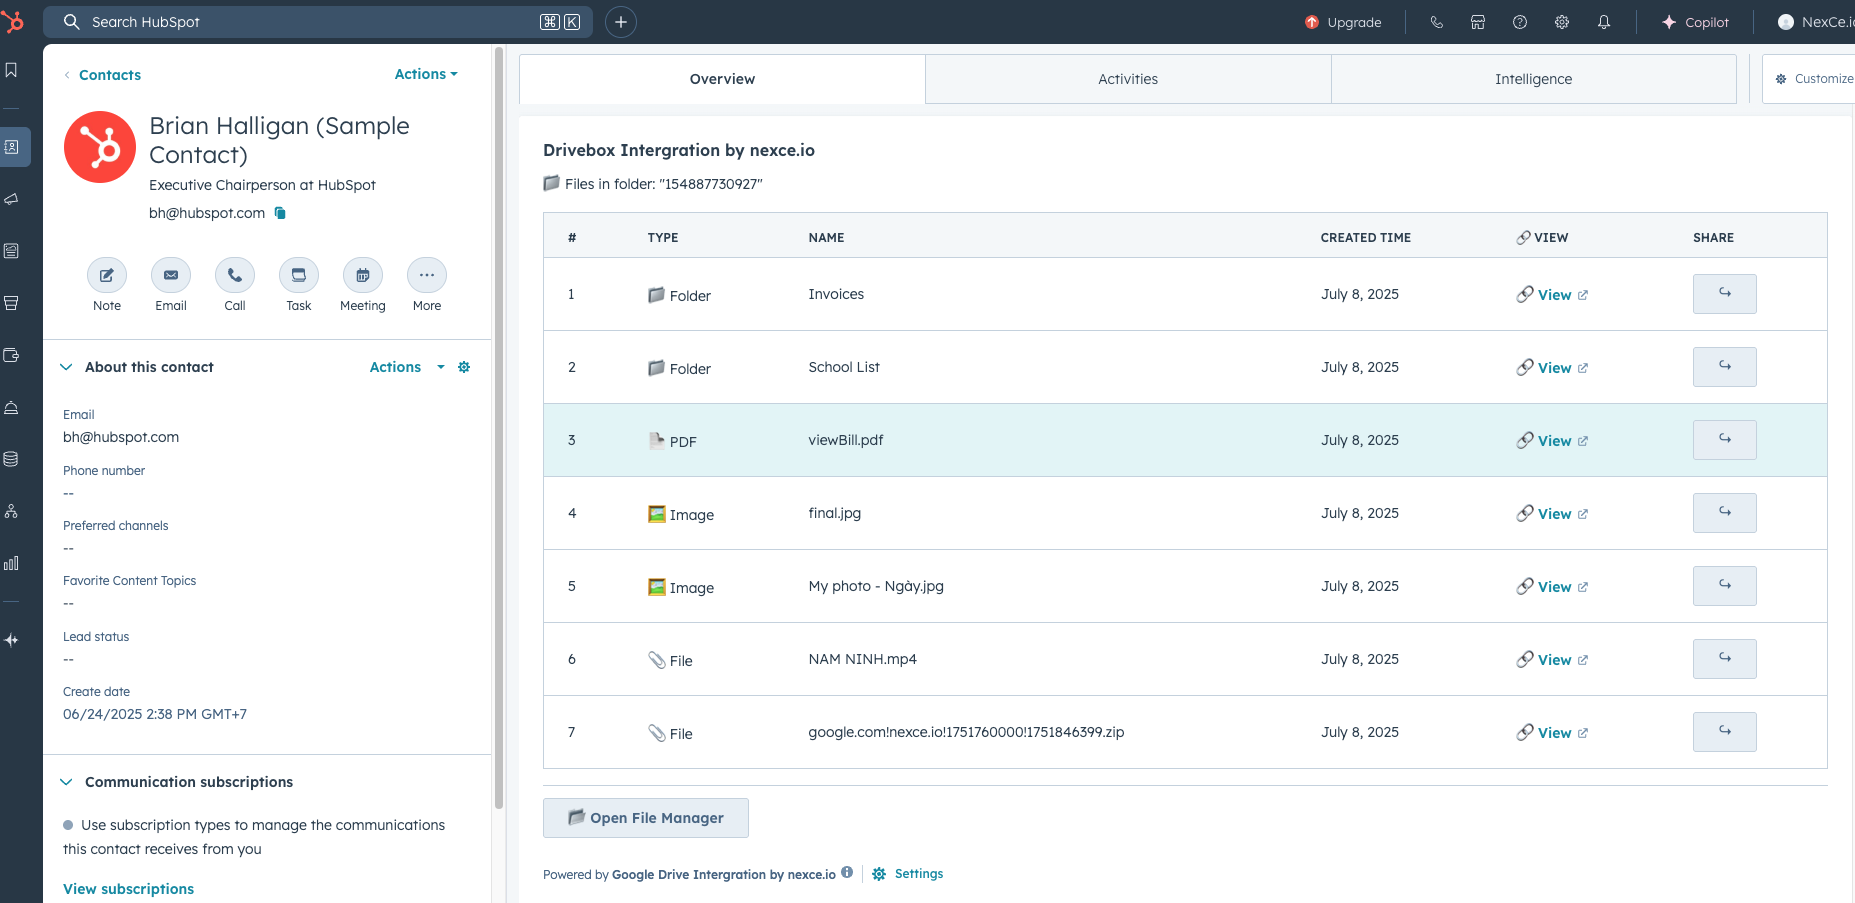
Once completed, you will see the Nexce.io Drivebox integration displayed directly on your HubSpot Contact or Deal detail pages, providing quick access to related files.
5. Managing Files and Folders in HubSpot Account
Once authorized and connected, you can perform various file management actions directly through HubSpot Account.
5.1. Accessing the File Manager
To manage your files and folders, you will need to open the File Manager within the Nexce.io interface. Each Contact / Deal has a separate folder
- Look for a button labeled “Open File Manager” and click it. This will provide an interface to interact with your Google Drive files.
5.2. Main Features
Via the OAuth token, you can perform the following actions:
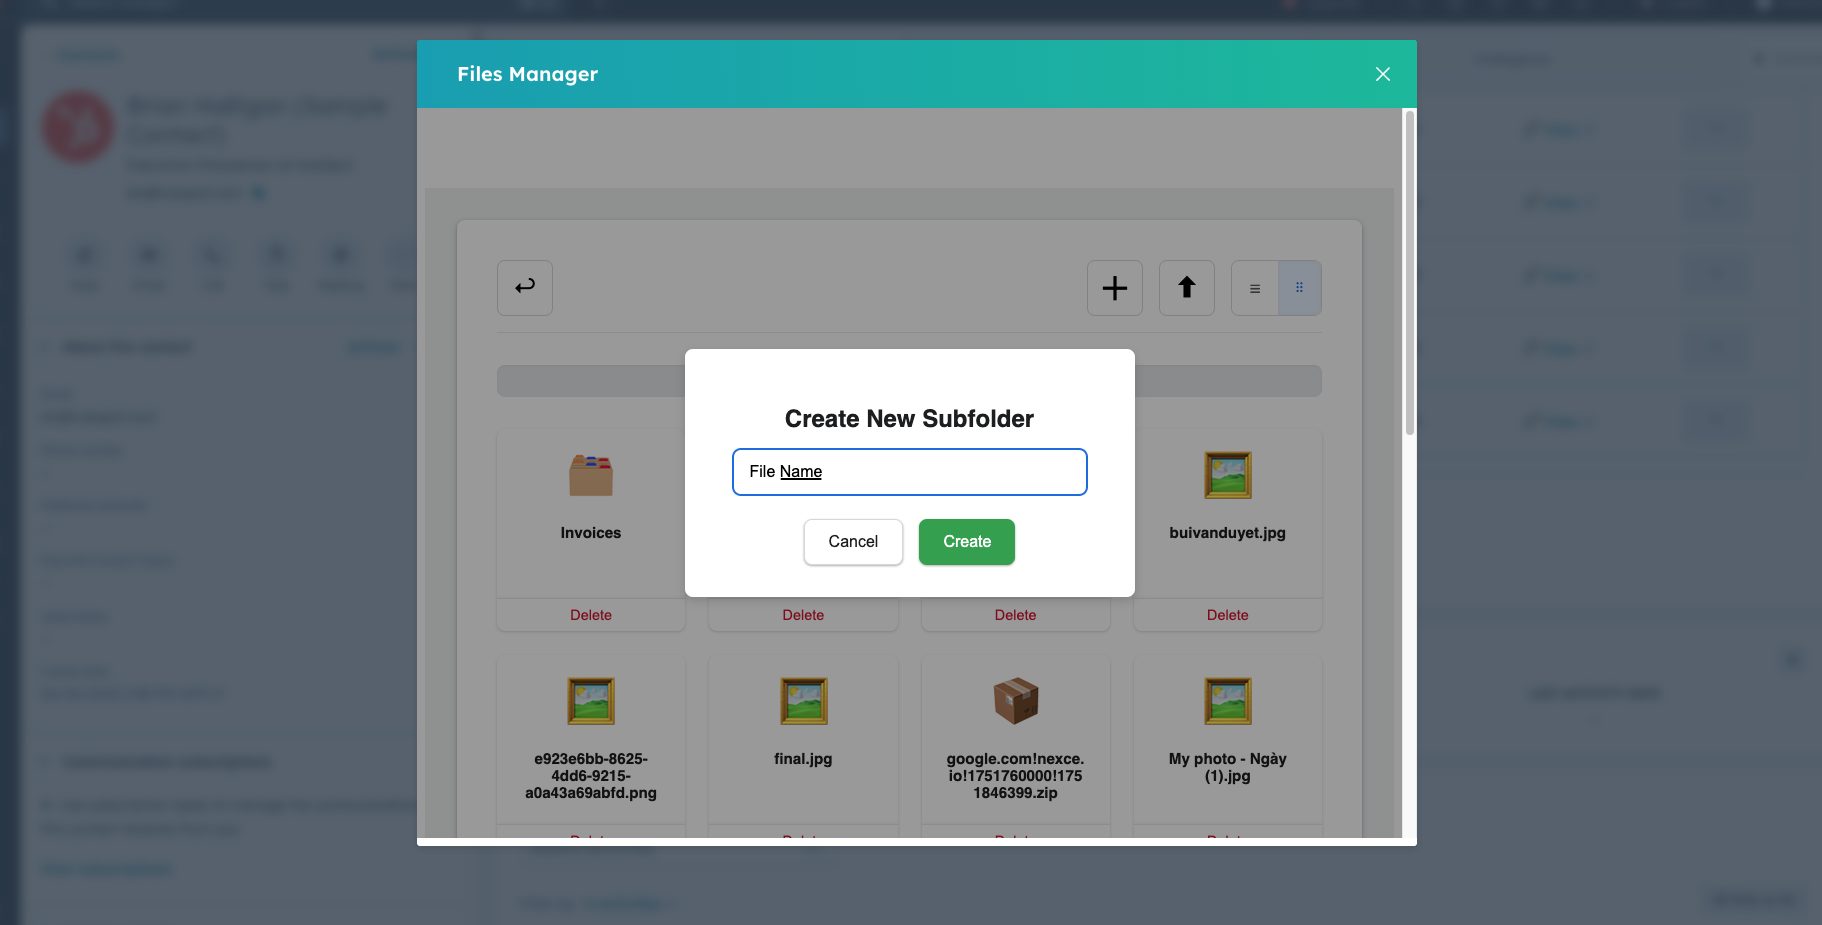
- Create Folders on Google Drive:
- Within the File Manager, locate the option to create a new folder.
- Enter the desired name for your new folder and confirm.
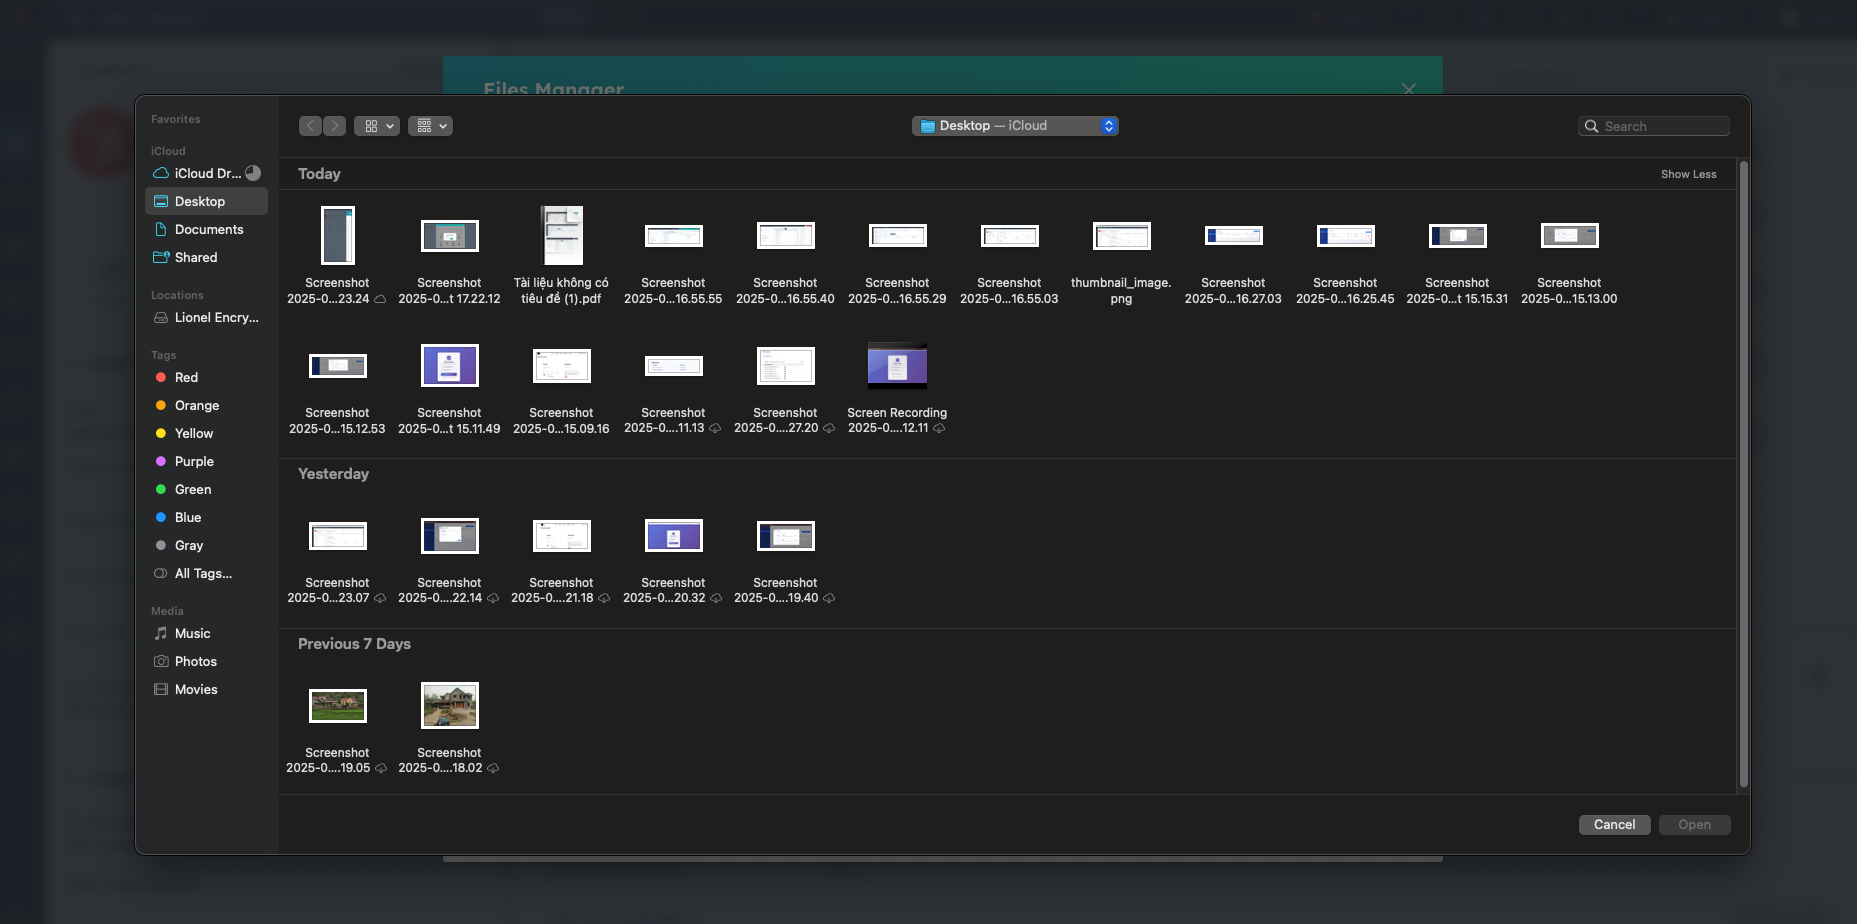
- Upload Files to Google Drive:
- In the File Manager, find the upload button (often represented by a cloud icon with an arrow or “Upload File”).
- Select the file(s) from your local device that you wish to upload.
- Confirm the upload.
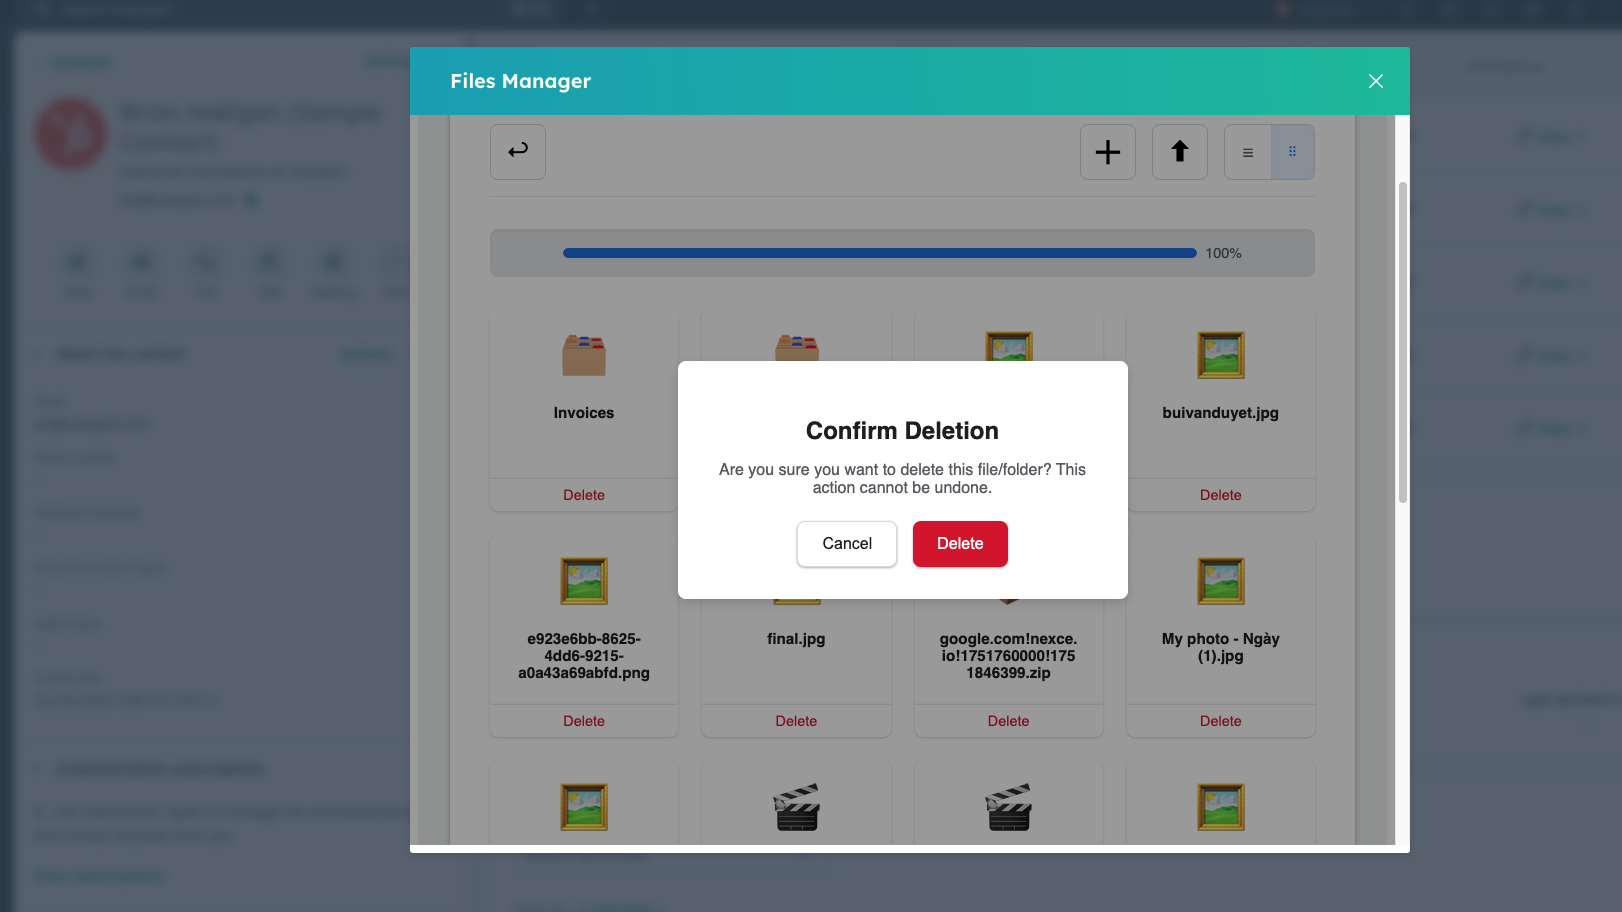
- Delete Folders/Files from Google Drive:
- Navigate to the folder or file you wish to delete within the File Manager.
- Select the item(s) and click the delete icon (often a trash can).
- Confirm the deletion when prompted.
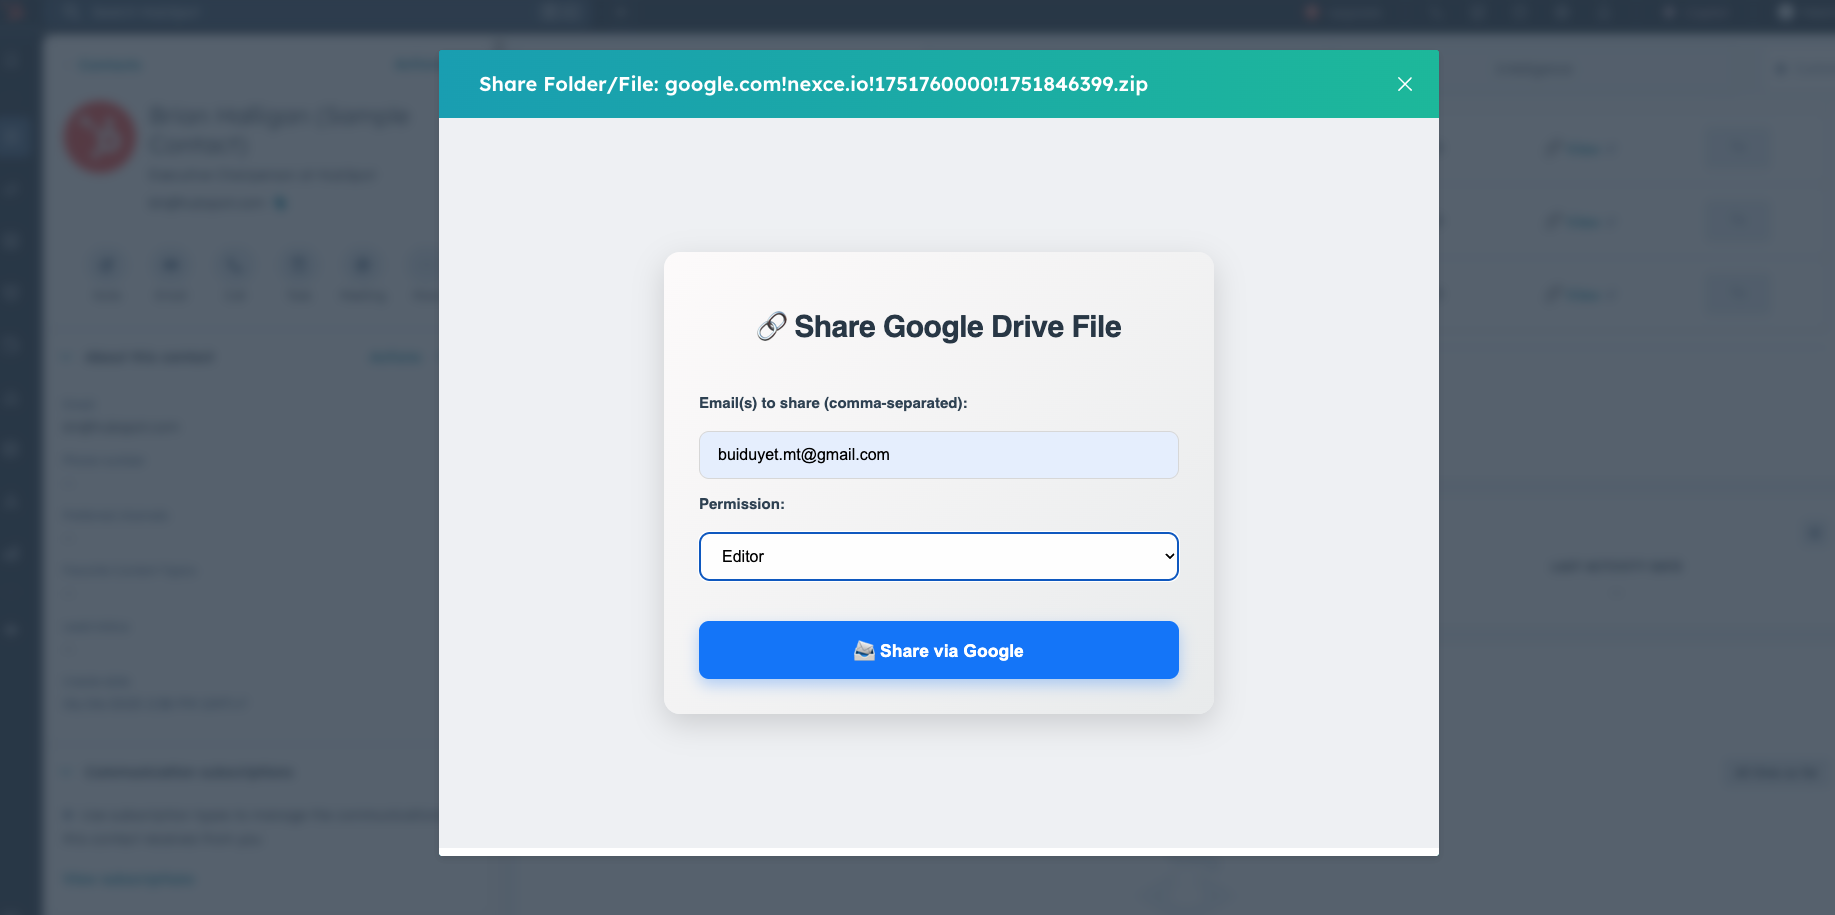
- Share Folders/Files with Other Users:
- Select the folder or file you want to share in the File Manager.
- Look for a “Share” option.
- Enter the email addresses of the users you want to share with and set their permissions (e.g., view, edit).
- Retrieve a List of Files and Folders from Google Drive:
- The File Manager interface itself will display the contents of your Google Drive, allowing you to browse and view your file and folder structure.
6. Additional Information
- A short video demonstrating the full OAuth workflow is available here: https://youtu.be/x2B2EnFfUlw
- Support: If you require any additional information, test credentials, or further clarification, please feel free to contact the Nexce.io support team (info@nexce.io).
We hope this guide has helped you better understand how to integrate Google Drive and HubSpot using Nexce.io. With these simple steps, you can easily manage your documents and data, making your work more efficient and productive. Good luck!